Lightroom Classic: organising your photos – a simple workflow for your catalogue. Losing track in Lightroom Classic? This guide shows you a simple workflow for importing, organising and selecting your photos quickly.
 Photos: Janek Stempel
A student editing photos in Lightroom Classic
 Photo: Janek Stempel
A student editing photos in Lightroom Classic
Lightroom Classic can quickly start to feel chaotic when you import hundreds of photos. But a few simple tricks will soon bring order! As a Visual Journalism student, I know how confusing and nerdy many of Adobe’s online guides can be. There are plenty of tutorials on importing, editing and exporting in Lightroom, but only a few show clearly how to use the marking and filter functions to organise your photos efficiently.
With a few simple techniques, though, you can sort and organise your pictures efficiently. This tried-and-tested workflow helps you keep track – whether you are planning a photo project or want to prepare your best shots for editing!
To improve my own Lightroom workflow, I developed this guide specifically for sorting, and once it had proved itself for me, I had my fellow students test it. If you’re looking for clarity and efficiency, you’ve come to the right place!
Don’t forget: everyone can adapt the workflow to their own needs.
The Library: the central place for keeping track
Once you have imported your pictures into the Library, you can view your entire photo collection clearly here. Only previews of the pictures are loaded, so navigation stays smooth – even with a large number of photos. That makes the Library ideal for quickly looking through and pre-sorting.
The Library also offers everything you need to organise your photo collection efficiently. With flags, ratings, colour labels and various view modes, you can personalise and speed up the way you work. With a little practice, Lightroom Classic becomes an indispensable tool in your creative workflow.
Because well-thought-out sorting is crucial for an organised workflow in Lightroom Classic!
Using the view modes in the Library
Before I show you the workflow, let’s take a short detour into the view modes. The Library offers various modes that help you look at the selected photos from different perspectives, display them more clearly and organise them more efficiently:
‘G’ (Grid view): shows all pictures in a grid – ideal for an overview.
‘E’ (Loupe view): highlights one picture so you can look at it in detail.
‘F’ (Full screen): shows a photo full screen.
‘N’ (Survey view): select several photos with Command (Mac) / Ctrl (Windows) + click and press N to show only those. All other pictures are hidden.
‘L’ (Lights Out mode): dims the screen apart from the selected photo(s).
This minimises distractions and lets you analyse the picture undisturbed.
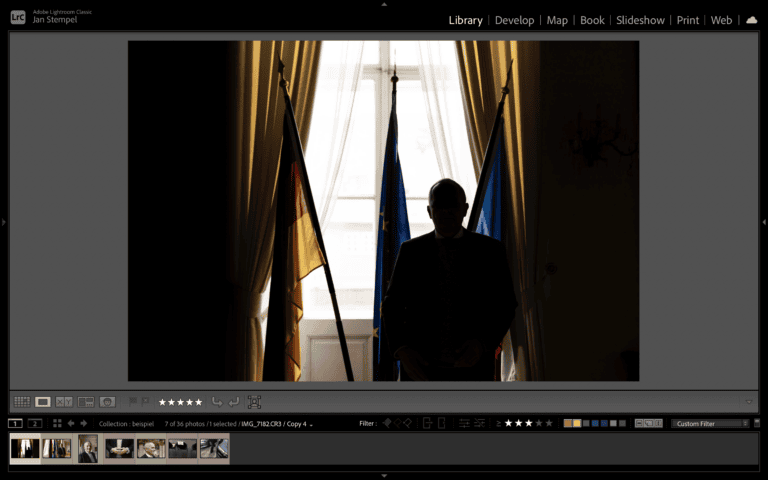 Loupe view
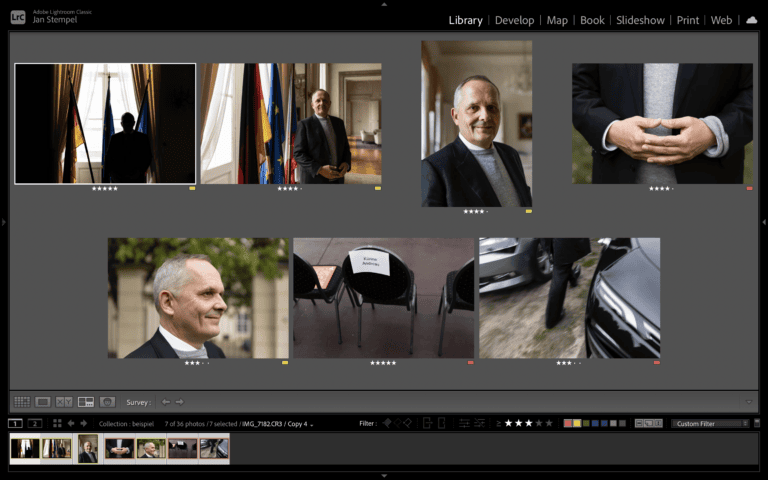 Survey view
 Lights Out mode
1. Flags for quick selection
Press ‘P’ to mark a photo with a flag (as a ‘pick’).
Press ‘U’ to remove the flag.
Flags are ideal for making a first selection when you look through your photos for the first time. This makes it easier to decide quickly which pictures are worth taking further. Use the ‘U’ key if you no longer want a photo in the selection.
2. Colour labels for categorising
To give your pictures colour labels, use the keys six to nine:
6: Red
7: Yellow
8: Green
9: Blue
Colours are great for sorting pictures by editing status or subject – for example red for details, green for wide shots, yellow for portraits and blue for anything else. But you can and should decide on your own ‘key’ and find out what suits you and your workflow.
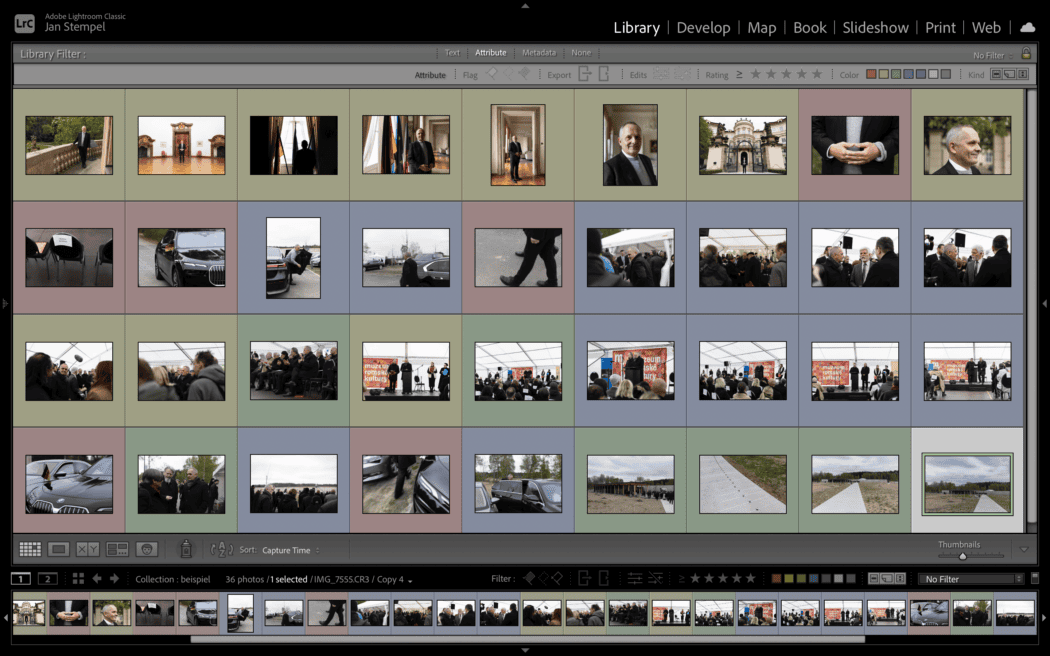 Photos from a photo reportage marked with different colour labels.
Pro tip: every photographer works differently – find out which colour labels work best for you. For example, you could use them like this: red for ‘still needs editing’, yellow for ‘ready to submit’, green for ‘final selection’, blue for ‘backup copy’.
3. Star ratings for prioritising
Use the keys 0–5 to give stars. A system might look like this, for example:
1 star: usable
3 stars: good
5 stars: outstanding
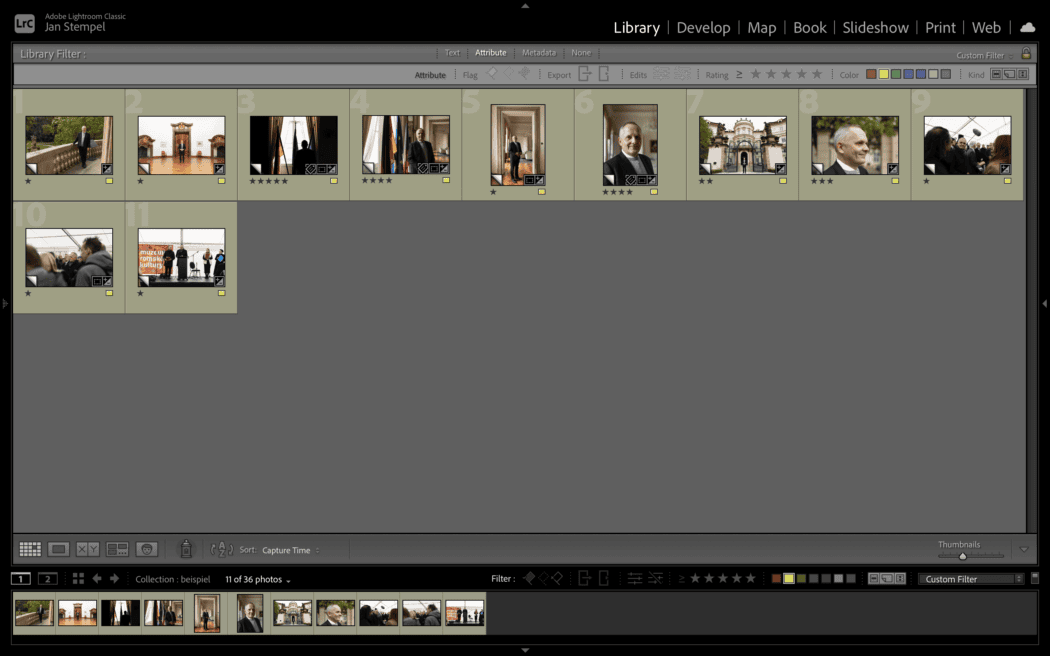 Star ratings, using portraits as an example.
Pro tip: if you have some time to spare, or are on the train after a shoot, you can often give star ratings in the camera. That way you can pre-sort on the move!
4. The filter bar
Once you have flagged and rated your photos, you can use the filter bar in the Library to show only certain pictures. Click on the filter bar (marked in red in the picture) and choose which criteria should be shown:
Flag filter: shows only pictures with or without a flag.
Rating filter: limits the view to photos with a certain number of stars (e.g. only pictures with ≥ 2 stars).
Colour labels: filter by the colour labels you have set, e.g. only photos labelled green.
You can also combine filters: for example, show only photos that have 3 stars or more and have been categorised by specific colours – e.g. only portraits (yellow) and details (red).
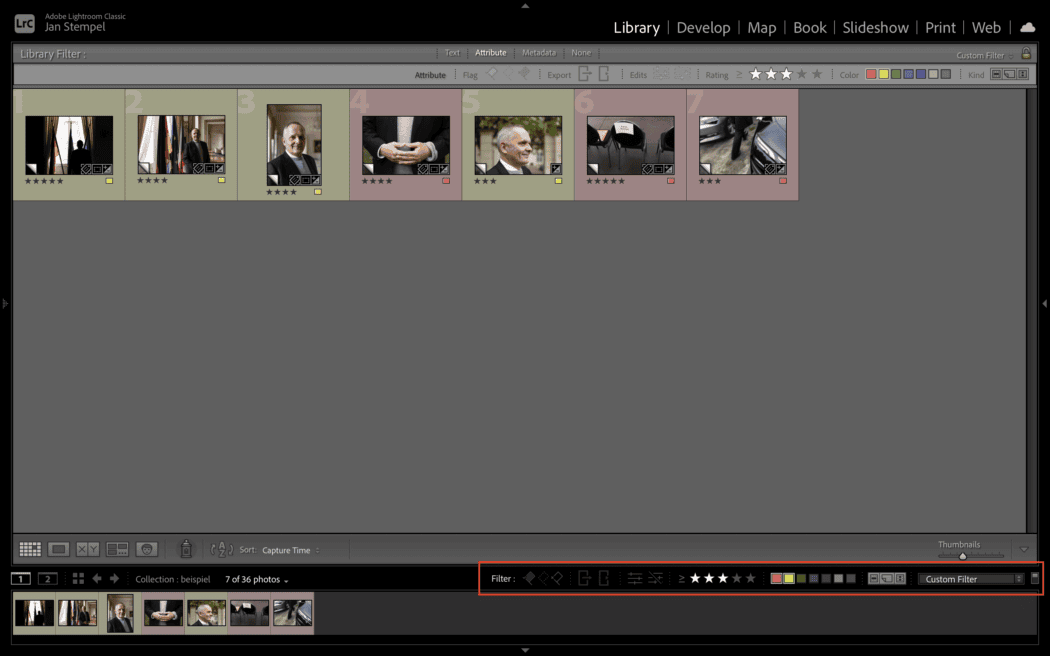 The example shows only portraits (yellow) and details (red) with 3 or more stars.
5. Building a photo sequence: sorting and arranging pictures
The filter bar in the Library view lets you not only filter selected photos by colour and rating, but also build a photo sequence.
In Grid view (‘G’) or Survey view (‘N’), you can simply drag and drop the displayed photos to create a logical order for your sequence.
Pro tip: need more space on screen to concentrate fully on your pictures? Press Tab to hide the side panels.
6. The Develop module: the next step towards perfection
After pre-selecting in the Library, switch to the Develop module to optimise and edit your pictures. There you can adjust exposure and colours, for example, to get the best out of the photos you have pre-selected.
7. Where to put your final selection? Using collections
One helpful tip is to use collections in Lightroom Classic. Grid view lets you sort manually, but the question remains: where do you put your final selection?
This is where collections come in handy. They let you group selected pictures permanently – as ‘Event XYZ_Selection’, for example. That way your favourites are kept independently of the folder structure and can easily be found again at any time.
Where can you find collections? In the Library, the Collections panel is on the left-hand side. Here you can create and name a new collection using the ‘+’ symbol. Once you have selected your pictures, you can add them by drag and drop.
Pro tip: for anyone struggling with catalogues and folders, collections are a valuable way to bring order to your selection!
A practical example
Imagine you have imported five hundred pictures from an event. You go through them and first flag all the usable ones with ‘P’. After the first round, you can set the filter bar to show only these selected pictures.
Next, you give star ratings, label the pictures with colours by type of shot – for example details red, portraits yellow and wide shots green – and filter them out so you can edit and sort them in a targeted way. This makes the selection process much more efficient and organised.
In Grid view, you drag the photos into a sensible order that tells the story of the event – starting with the wide shot, moving through atmospheric details to the best portraits.
And voilà – you have your first pre-sorted photo sequence!
Summary
With this simple but effective workflow, you bring structure to your selection and save valuable time. Instead of being overwhelmed by thousands of pictures, you now have a clear system for quickly identifying, sorting and organising your best shots.
Summary of the steps:
1) Flag the best pictures
2) Use colours for clear categorisation
3) Rate with stars to set priorities
4) Filter to display pictures efficiently
5) Put your pictures in a logical order
6) Edit your photos
7) Use collections
Try out this workflow and adapt it to your own needs – you’ll see how much more efficiently you can organise your photos and how it helps your creativity too. Good luck!