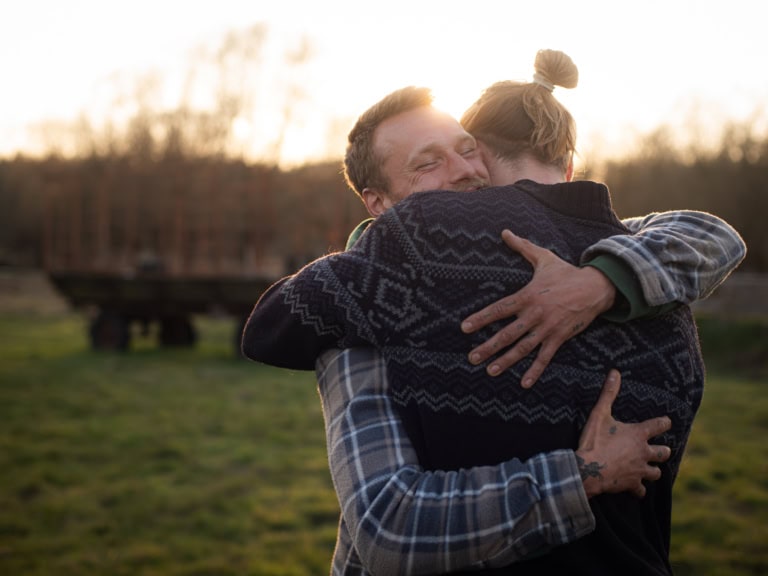
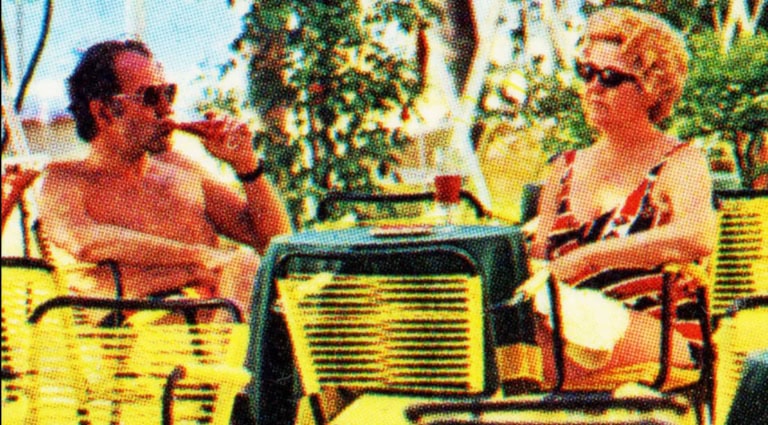
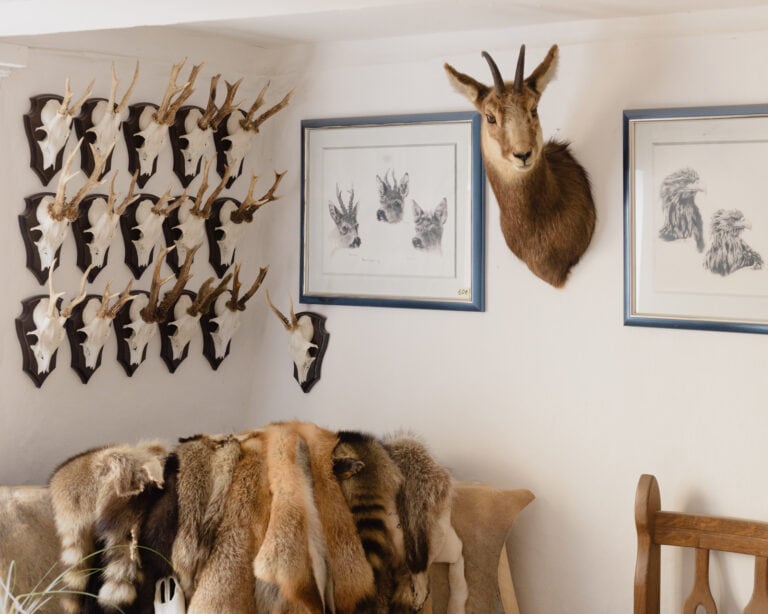
Off-camera flash: how to use a speedlight on the go. Artificial light opens up new creative possibilities – but it can be a challenge for beginners. We show you how to get started with off-camera flash: what equipment you need and how to use flash confidently on the move.
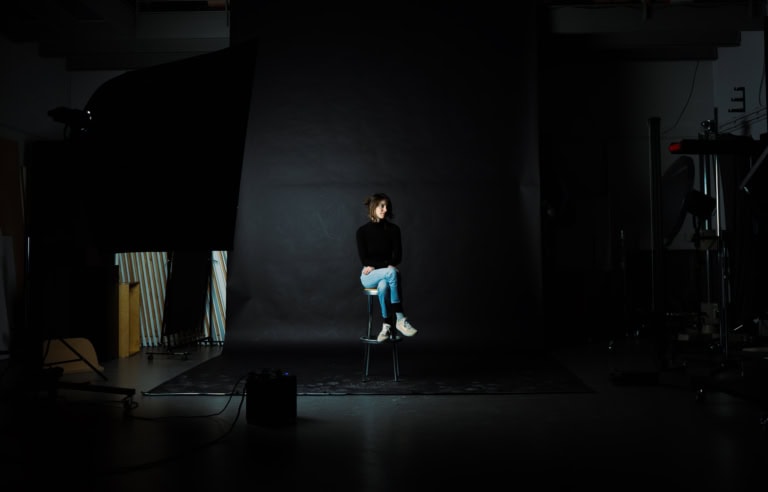
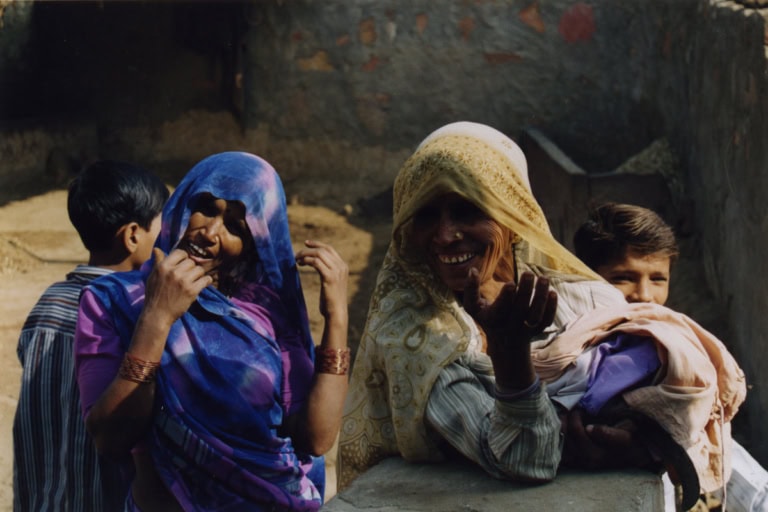
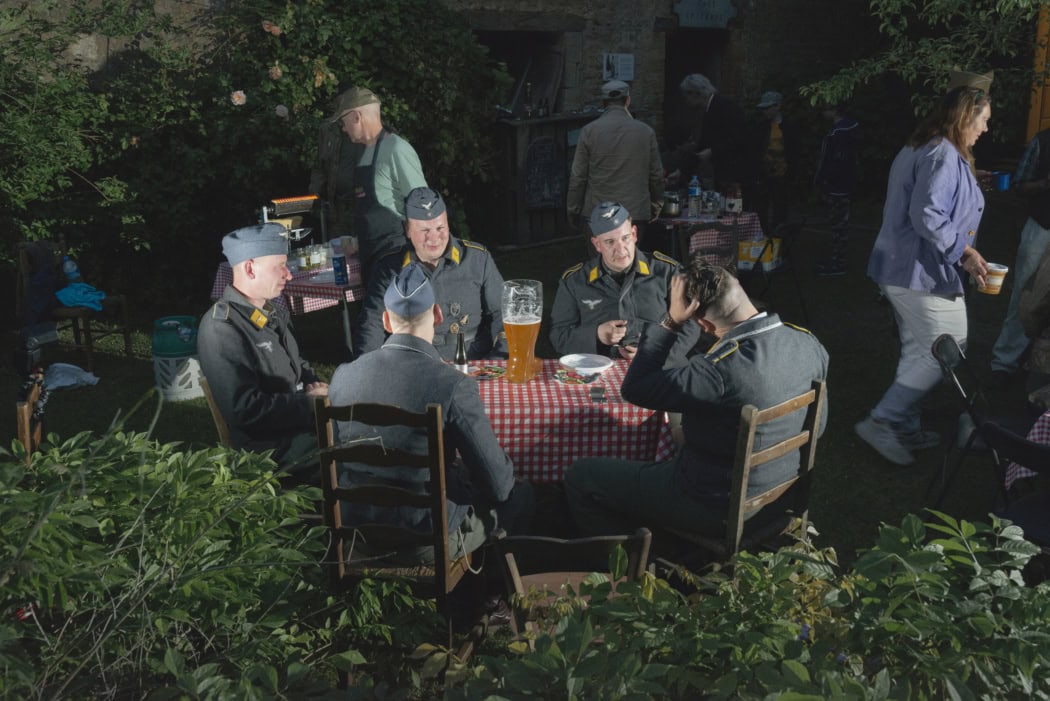 Photo: Simon Deppe, Carentan-les-Marais, France, 2024
Using flash in reportage photography is both a technical and a creative challenge that requires practice, patience and a good feel for using light in the right way. Direct, bounced or off-camera – each method has its specific advantages and uses. What always matters is to use flash to support the message of the picture, not as a dominant effect that distracts from the content.
For beginners in particular, it is essential to get to know the various techniques step by step and actively explore the effect of light. Only once you have mastered artificial light can you use it flexibly and deliberately to tell stories and convey emotions.
With the basics covered in this article, you have the tools to integrate flash creatively and effectively into your work. Now it’s time to try things out, experiment and have the courage to shape your pictures with light – that way you can add a fascinating dimension to your visual language.
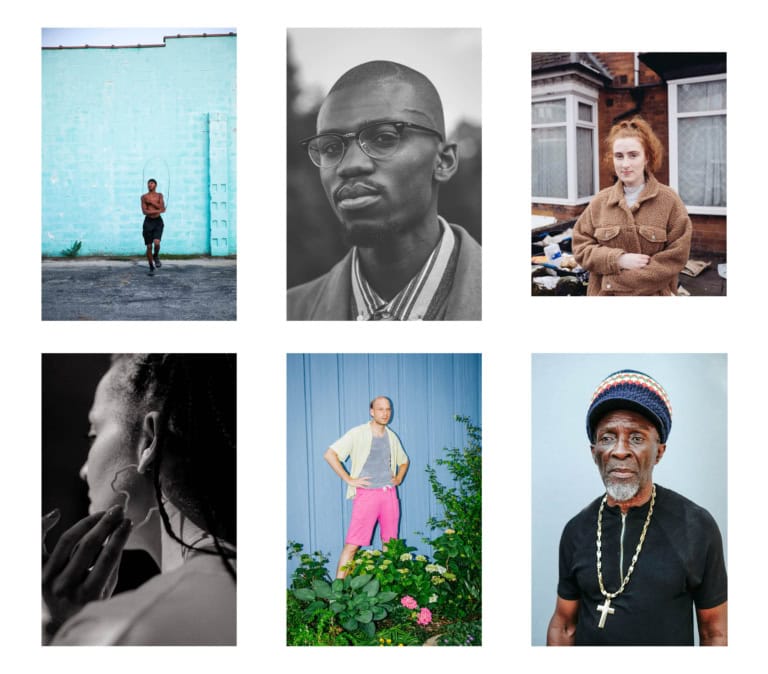
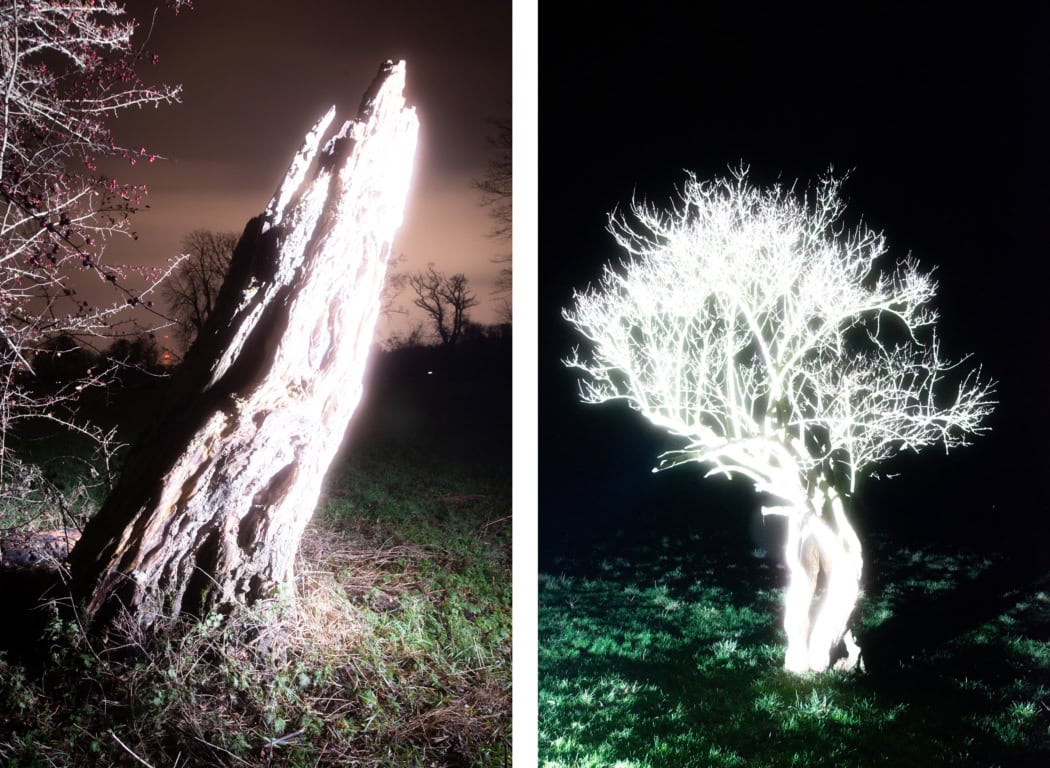 Photos: Simon Deppe, from the work ‘Carrier Bag’
Effect or message? The art is to use flash in such a way that viewers don’t notice this technical detail.
Careful – use with restraint!
Moderation is called for when using artificial light, because flash is an effect – and like any effect, it can lose its impact if overused. There is a risk that the flash overwhelms the content of the picture. If the light is so dominant that it distracts from the message, viewers tend to focus on how the photo was made technically, or on its ‘gloss’, rather than engaging with what it says.
Flash should support the message of the picture, not compete with it or become an end in itself. Especially at the beginning, it’s easy to overdo the appeal of the new look. So the challenge is to find the right balance for each situation.
Contents
1. What do I need to use flash? A brief overview of the most important equipment for flash on the go
2. Operating a speedlight: an introduction to the technical details of flash
3. How flash and camera work together: which setting do I make where? A few tricks to avoid confusion
4. The characteristics of speedlight light: the properties of small light sources and how to get them under control
5. Direct flash: quick and effective. A punchy look for dynamic situations
6. Bounce flash: the trick for soft light with a minimal set-up
7. Off-camera flash: the supreme discipline on the go, with maximum creative freedom
8. Colour temperature and flash distance
9. Conclusion
1. What do I need to use flash on the go?
For flash on the go, speedlights (on-camera flashguns) are the obvious choice. They are small and compact but still offer an astonishing range of possibilities. They run on batteries, which makes you independent of power sockets. Depending on how you want to use flash, you’ll need one or two units. That depends on your design, the ambient light and your level of knowledge and practice.
A transmitter is also important. It is a remote control for your flash: you slide it onto your camera’s hot shoe and can then control the flash power from anywhere. That makes ‘off-camera flash’ possible, where the flash isn’t mounted on the camera but can be positioned freely in the space. You’ll find more on this in chapter 7: Off-camera flash.
To set up your flash in the room, you need a stand. There are special light stands for this, but they can be heavy and unwieldy. I use a lightweight (camera) tripod with a ball head, so the flash can be aimed very flexibly.
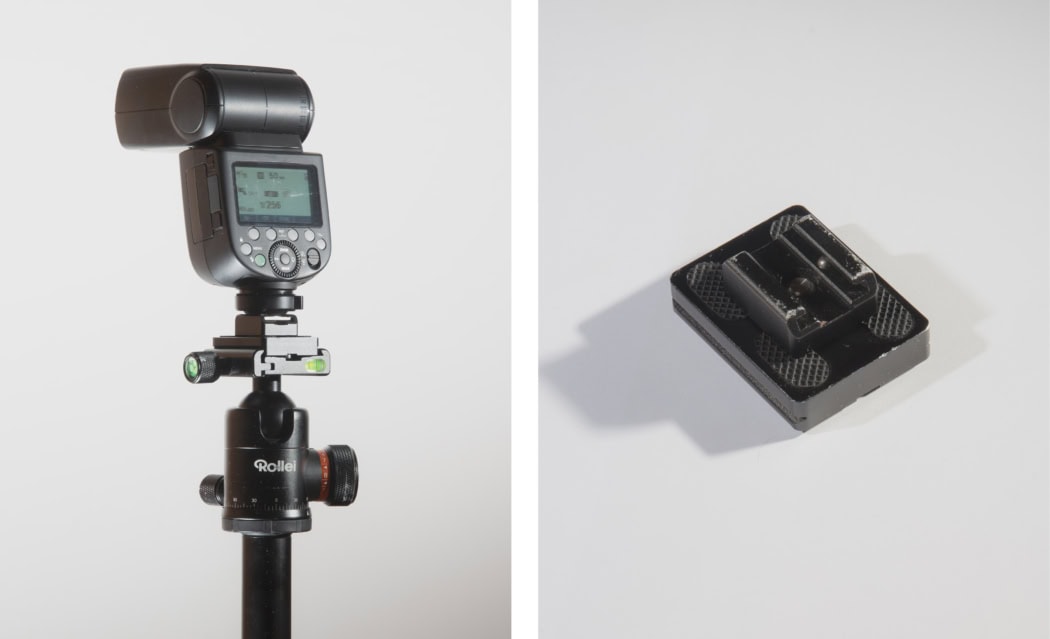 Photo: Simon Deppe
Left: speedlight on a photo tripod with ball head. Right: cold shoe adapter on a tripod plate with a 1/4-inch thread.
Before a shoot, you should also try out at home whether everything works. You will usually need an adapter to mount the flash on the tripod: tripods usually have a 1/4-inch thread, while flashes have a hot-shoe foot. One way to mount the flash is a cold shoe mount, which has a shoe for the flash and a thread for the tripod. But there are also brackets that clamp the entire flash and mount it on the tripod (e.g. the Godox S-type bracket).
Last but not least, don’t forget charged batteries! A flash usually drains its batteries much faster than your camera does.
2. How do I operate a speedlight?
Like a camera, most flashes have two modes – a manual one and an automatic one:
TTL (through the lens)
In a flash’s automatic mode, the camera and flash communicate with each other to calculate how much flash power is needed. The automatic mode tries to produce a perfectly exposed picture. That makes it the most beginner-friendly mode, as you only have to switch the flash on – the technology does the rest. But it also means leaving some of your creative decisions to your camera.
M (manual)
In manual mode, on the other hand, all settings are open. That makes this mode demanding, because you have to keep an eye on all the settings and adjust them at all times. But it gives you full control over your picture, so you can realise it exactly as you planned.
How much power does my flash need?
If you opt for manual mode, the most important setting on a flash is the flash power. It determines how bright the flash is and is given in fractions: 1/1 is the flash’s full power, while a setting of 1/2 uses only fifty per cent. Simple enough. Most flashes can even be turned down to 1/128 or 1/256.
Tip and background
When working with artificial light, it can happen that the flash stops responding for a few seconds. To understand why this happens and how to avoid it, you need to know how a flash works:
Firing a burst of light requires a great deal of energy in a very short time. A normal battery can’t supply that much energy so quickly. That’s why flashes contain capacitors, which can store energy briefly and release it very quickly. If you fire a flash at full power (1/1), the capacitor is completely discharged. It then has to be recharged from the battery. This usually takes a few seconds (3–8 seconds) and leads to waiting times. If you flash at 1/2 power instead, you can fire twice in very quick succession before you have to wait again. So it’s worth paying attention to how often you need to fire and whether fast recycling times are needed.
 Graphic: Simon Deppe
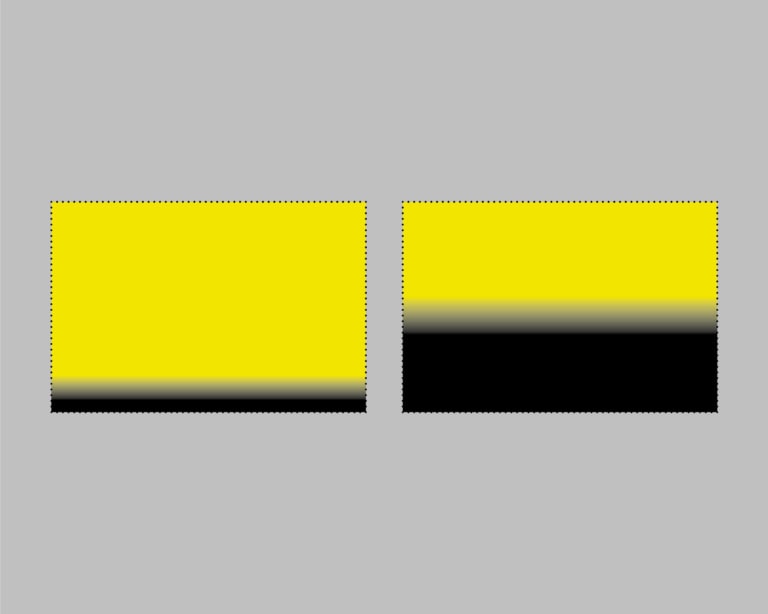
Flash sync speed is an important setting that has to be made on the camera. The shutter and the duration of the flash burst must be synchronised so that they work at exactly the same time. That is only possible up to a certain shutter speed. If a dark or black band appears at the edge of the picture, you know you have exceeded the flash sync speed. It depends on the camera and flash model and is usually between 1/80 s and 1/250 s. Modern flashes offer HSS (high-speed sync), which allows shutter speeds of up to 1/8000 s.
 Graphic: Simon Deppe
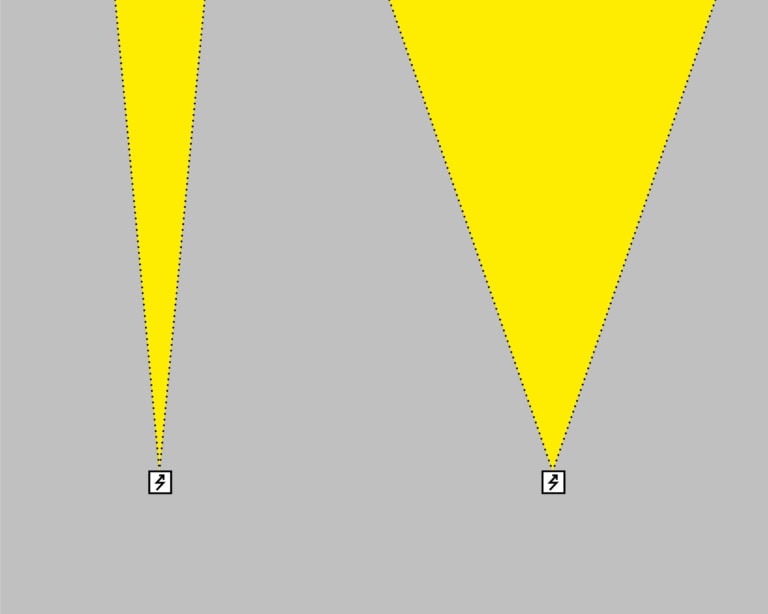
Most flashes have a zoom head, which lets you vary the beam of the flash. The zoom level is given in millimetres and corresponds to the focal length of camera lenses. So if the flash is set to 50 mm, it will fully light a photo taken with a 50 mm lens. If the flash is set to 120 mm, the beam narrows and the light no longer reaches the edges of the picture.
3. How do flash and camera work together?
Finding good combinations of flash and camera settings takes practice and experience. So try out a lot to get a feel for different situations. For a start, though, there’s a simple guideline that usually works: make all your camera settings first and leave them unchanged. Then set the flash. At the beginning, it’s important to keep the two sets of settings separate, so that you get a feel for which setting has which effect. The practical example shows you how to apply this technique.
Practical example and exercise
Set the camera so that the room and the person are slightly underexposed (e.g. ISO 400, 1/100 s, f/8). Now all the camera settings are done, and you can turn to the flash. Set the flash power so that the person is correctly exposed (e.g. 1/128 power). This gives you a picture in which the surroundings are darkened and the person portrayed is perfectly exposed.
With this method, you learn how to balance existing light and artificial light. In the next step, you can change that balance. You could, for example, heavily underexpose the surroundings (camera settings: e.g. ISO 100, 1/250 s, f/11) and use the flash to light the person again (flash power: e.g. 1/4). This strengthens the visual focus on the face, and the background fades further and further away.
The more you darken the ambient light with your camera settings, the higher the flash power has to be to light the person again.
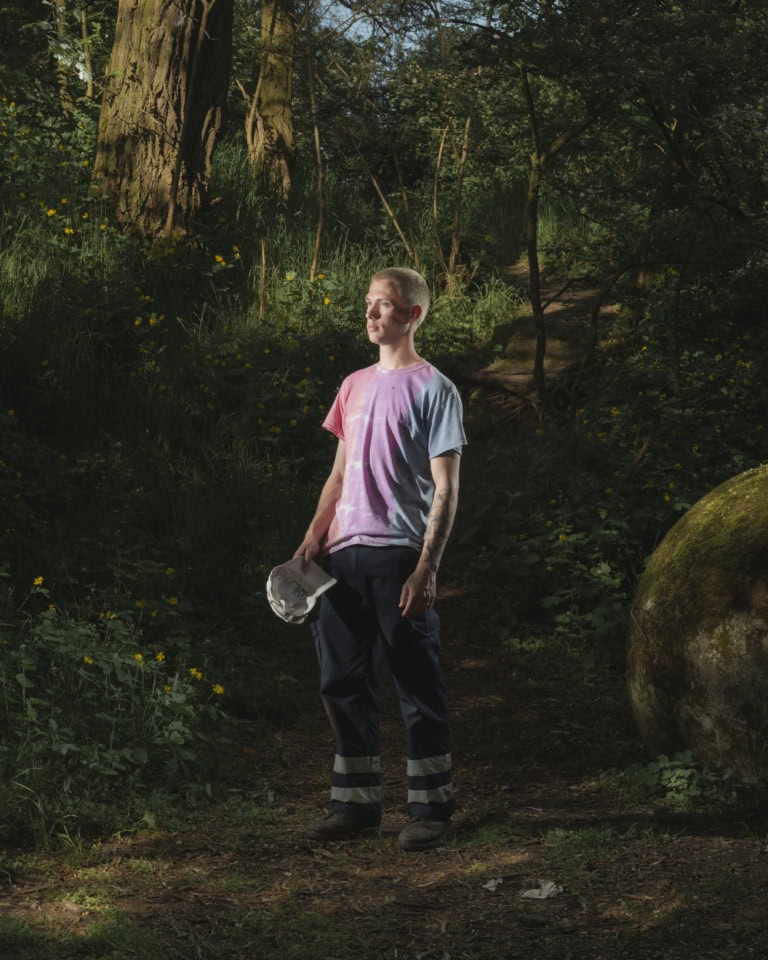 Photo: Simon Deppe
Balancing camera and flash settings In this example, the camera settings are chosen so that the surroundings are slightly underexposed. The person is lit with flash so that they are correctly exposed, putting the focus of the light on the main subject. Lighting set-up: two speedlights on stands, strong from the left, weak from the right. Camera settings: ISO 100, 1/160 s, f/11 Flash power (left): 1/4 at a distance of 3 metres
4. The characteristics of speedlight light
Speedlights are very small light sources, which means they create very hard shadows. In practice, that quickly leads to dramatic pictures with high contrast. It is usually not enough simply to fire straight at your subject. And that brings us to an important insight about using flash on the go:
 Graphic: Simon Deppe
Left: speedlight (small light source). The circle’s shadow is sharply defined – also called ‘hard’. Right: softbox (large light source). The circle’s shadow is blurred – also called ‘soft’. Small light source = hard shadows. Large light source = soft shadows.
In chapters five to seven, I explain ways of using flash in a less obtrusive, more subtle way. Working on the move often doesn’t allow you to take large softboxes or reflectors with you. But there are a few tricks for creating soft light – or at least somewhat softer shadows – anyway.
Getting unflattering light under control is one of the biggest challenges when working with speedlights.
 Simon Deppe
5. How do I use direct flash?
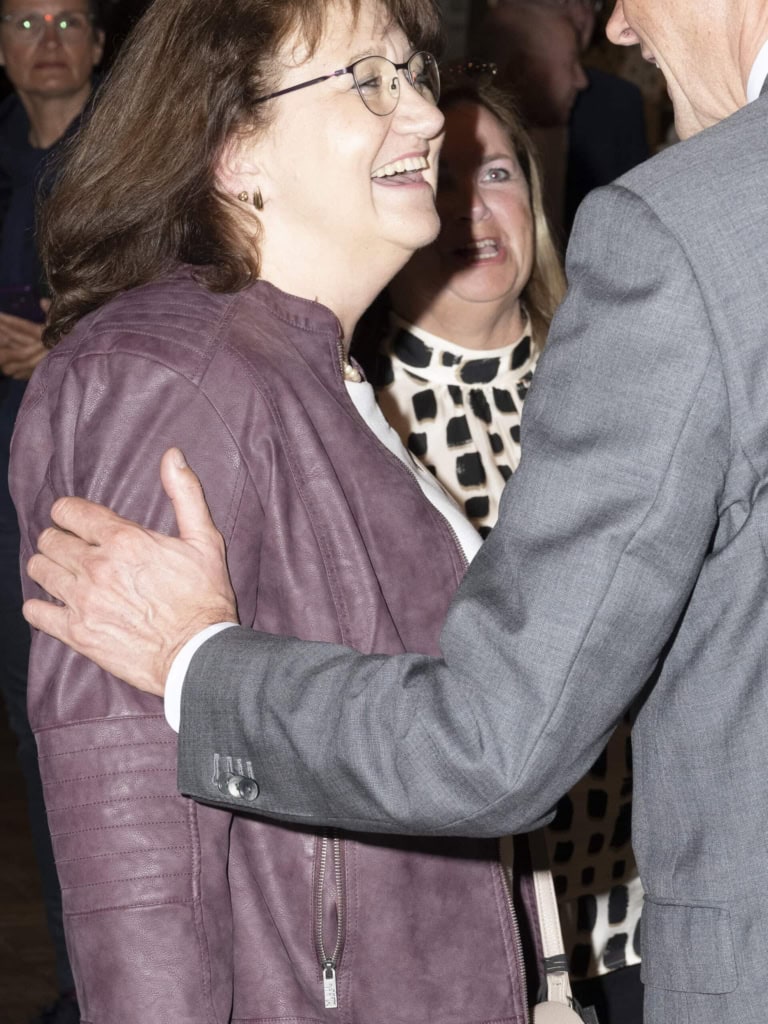
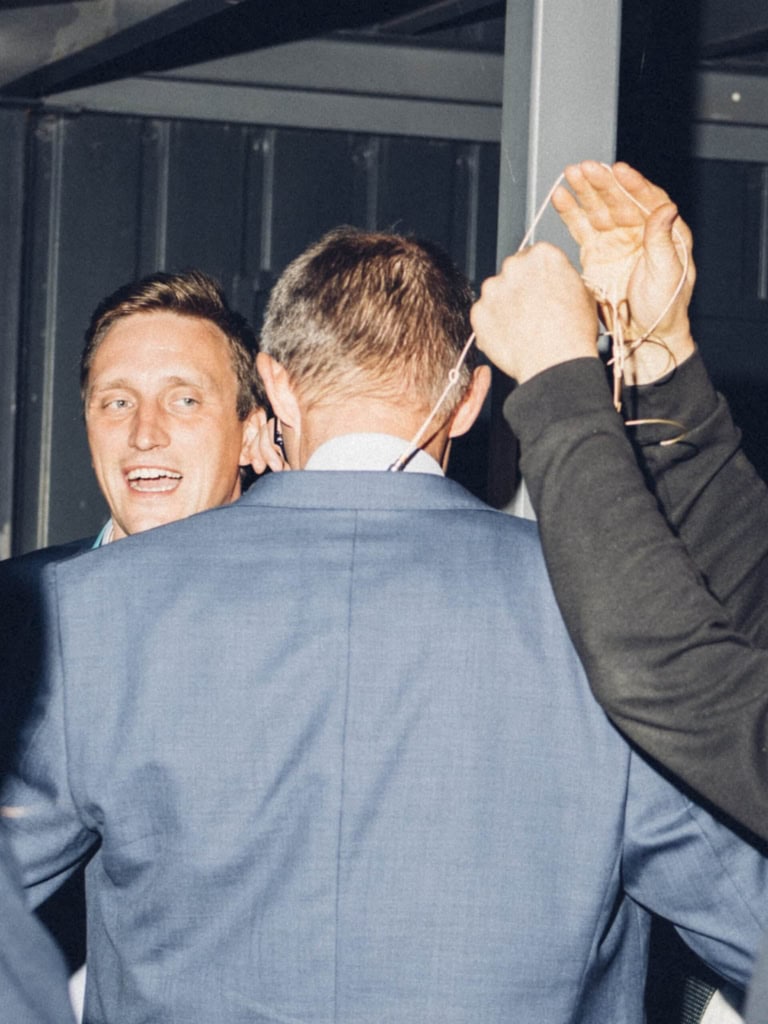
The flash is simply mounted on the camera’s hot shoe and pointed forwards. This creates a very flat, punchy look – familiar from the typical party pictures taken with point-and-shoot cameras. Used well, this kind of flash can be effective too, as Martin Steger shows in his work on Friedrich Merz.
Direct flash is the simplest way to work with artificial light. You don’t depend on white surfaces to reflect the light. Hard shadows are barely visible either: because the camera and flash point at the subject from (almost) the same angle, only a small drop shadow appears. You don’t have to position stands or set up lighting. That also means direct flash is a very fast way to work, and dynamic situations are easy to capture.
 Photo: Martin Steger, ‘Friedrich Merz: Zwischen Blackrock und Kanzleramt’ (Friedrich Merz: between BlackRock and the Chancellery)
6. How do I use bounce flash?
The aim of bounce flash is to create soft light. To do so, you need to enlarge the light source. For this, we can simply use reflectors that are available (almost) everywhere: walls, ceilings or other white surfaces.
We point the flash at a wall or the ceiling. The flash can stay mounted on your camera – you simply point it upwards (ceiling) or to the side (walls). The surface acts like a large softbox and reflects the light onto the subject. Bear in mind that much of the light output is lost, so you’ll have to turn your flash up a lot.
Note: the wall and ceiling must be white or grey. If they are another colour, the picture will get a colour cast!
 Photo: Isabel Reda
For this portrait, photographer Isabel Reda bounces the flash off the light-coloured table in front of the subject. The light is reflected and falls on the face. Because the surface is larger (the table becomes a light source), the shadows are soft.
Tip: the flash technique is visible in the reflections in the glasses and eyes. Look closely and you can make out the table and the position of the flash.
Practice makes perfect!
Practise using flash at home and try out how different surfaces and flash distances work. There aren’t always suitable walls or ceilings within reach. It’s also important to make sure the surface you use isn’t in the picture – it will appear very bright and can burn out.
The three flash methods compared
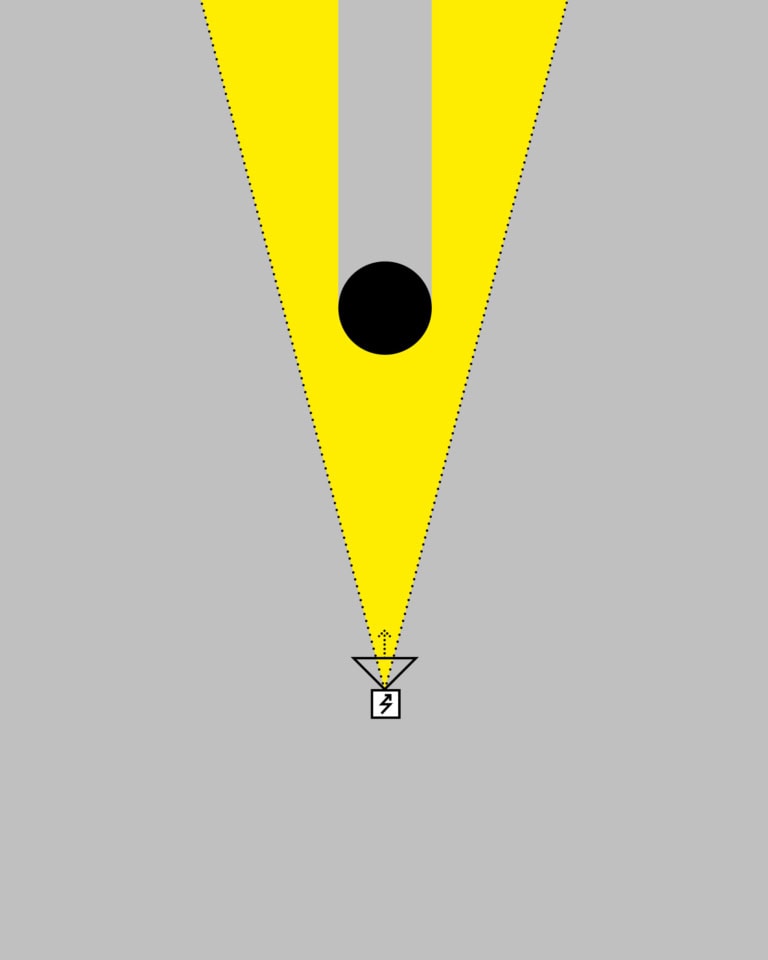
With direct flash, the flash is mounted on the camera and the beam is aimed straight at the subject. The flash’s small light source creates hard shadows.
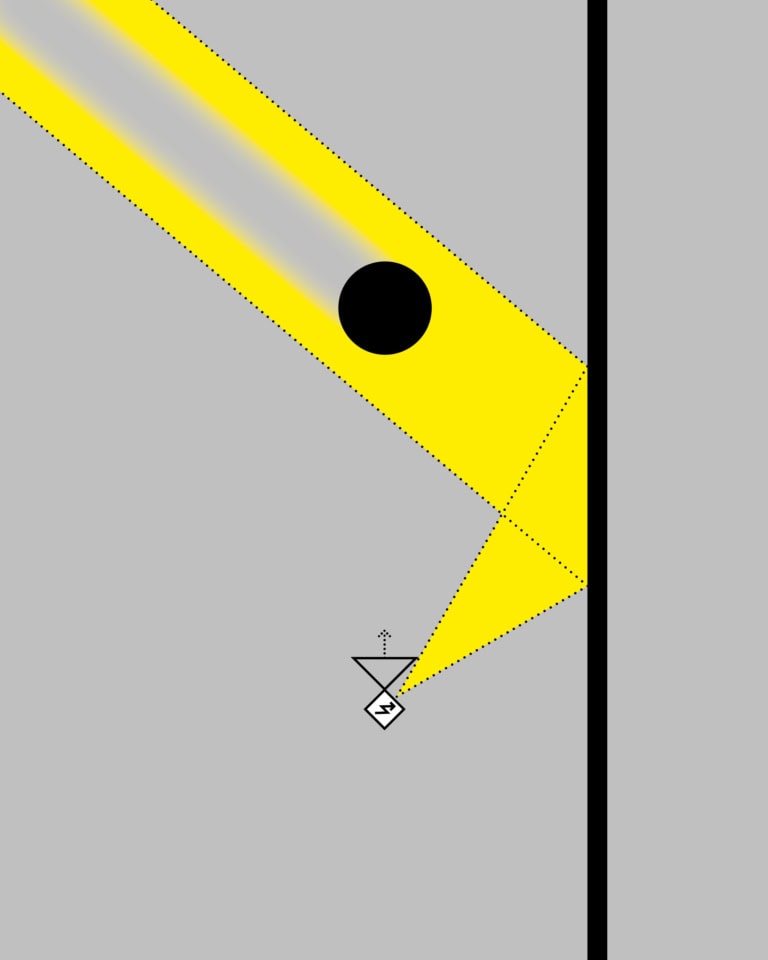
With bounce flash, the flash is fired at a white surface (e.g. a wall), which reflects the light and enlarges the light source. The shadows become soft.
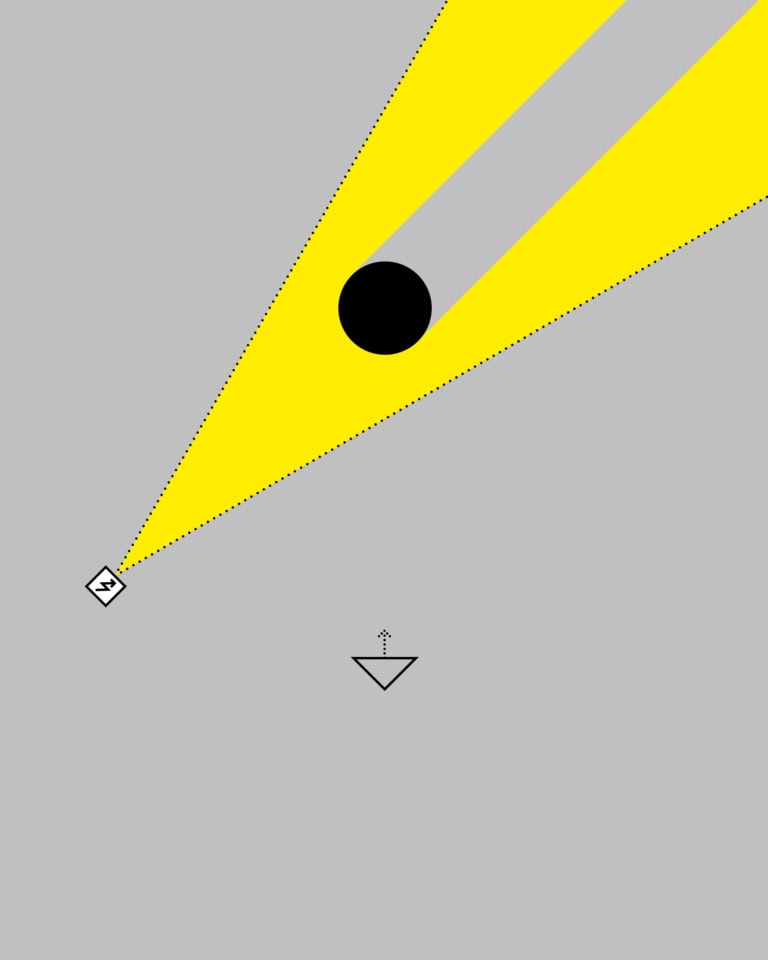
With off-camera flash, the flash is removed from the camera and controlled via a transmitter. The light can be positioned freely in the space.
7. How do I use off-camera flash?
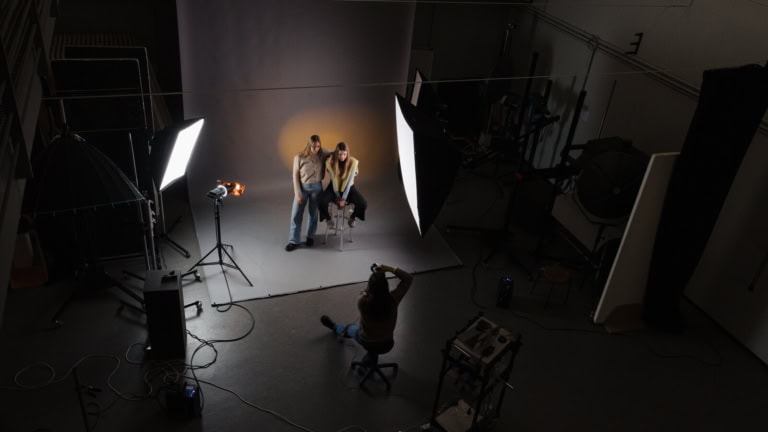
Off-camera flash is the most demanding way of using flash. But it also offers the most possibilities. The flash is removed from the camera and positioned freely in the space, controlled via a transmitter (a remote control for flashes). This works with one or several flashes. You can then set up lighting much as you would in a studio. I’ve found a camera tripod with a flash mounted on it to be practical: the light can be moved quickly and easily, and the ball head makes it easy to aim the beam.
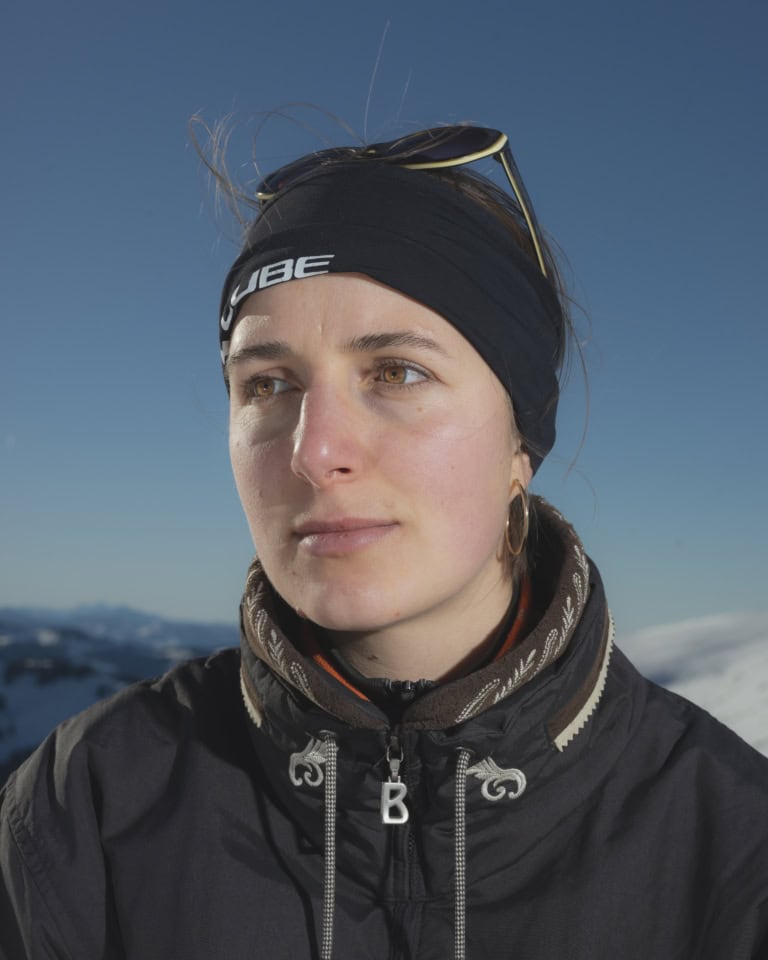 Photos: Simon Deppe, from the work ‘Homo Quaerens’, 2024/25
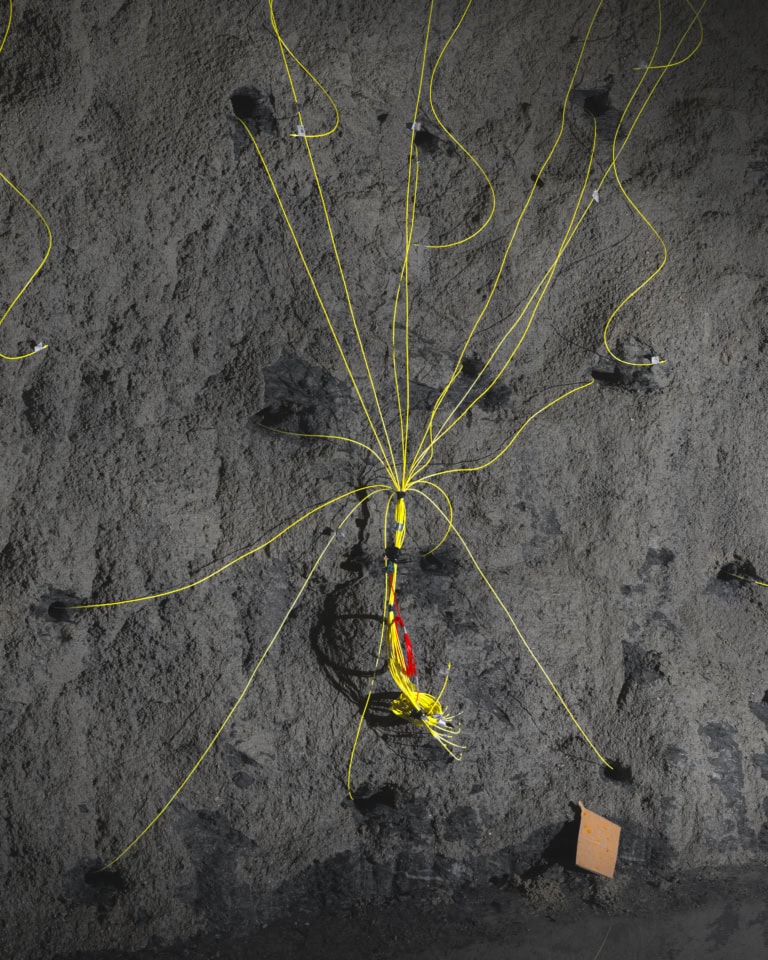
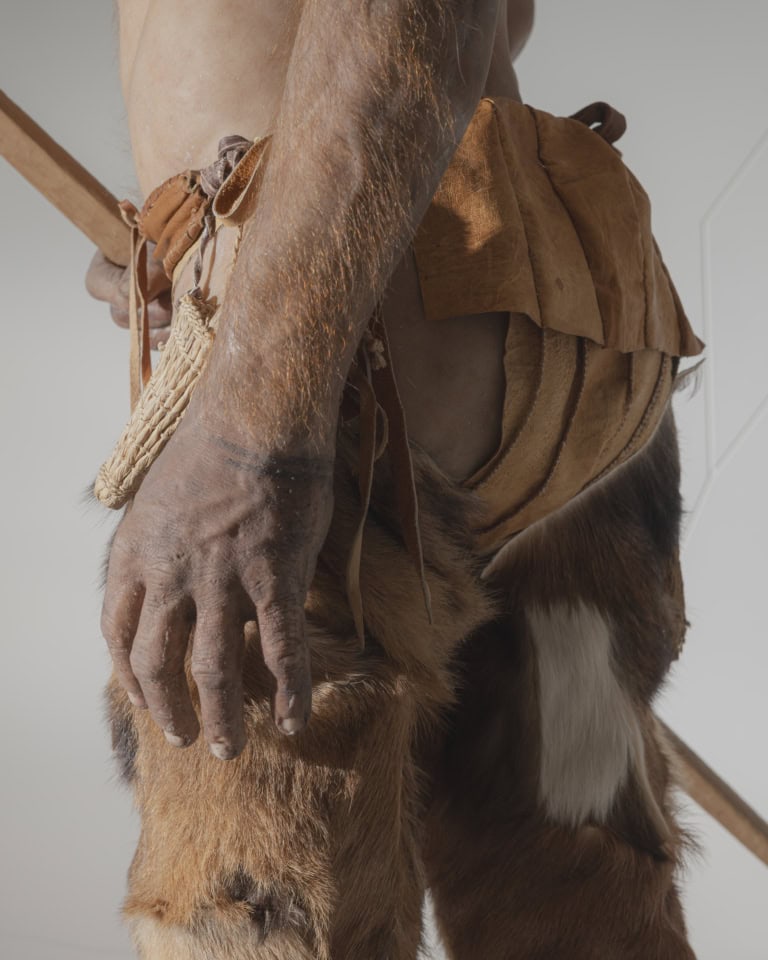
The many possibilities of off-camera flash offer great creative freedom. At the same time, though, they can also be restrictive! It becomes much harder to photograph spontaneously and in the moment. Every picture has to be ‘foreseen’, because setting up the light takes time. So you have to try to anticipate what your subject will do.
Static situations are particularly easy to photograph with off-camera flash, because they leave time to position the flashes. Many reportages made this way show a particular kind of picture: dynamic situations are mostly absent, because you can only capture them with a great deal of luck. You could also say that off-camera flash brings calm into the picture.
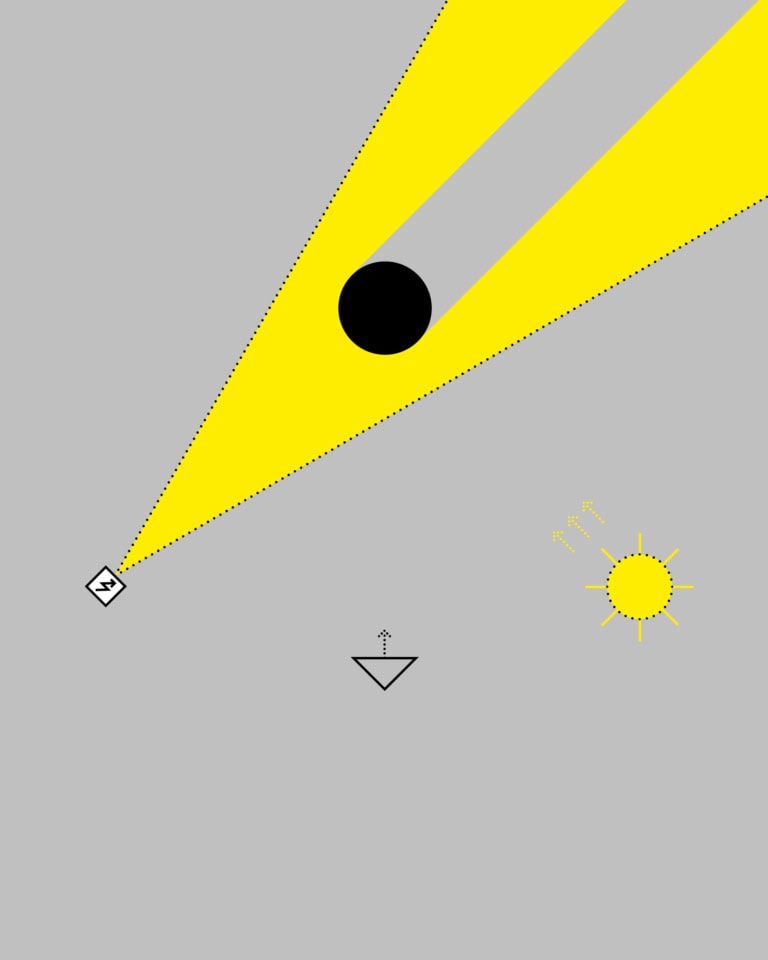 Graphic: Simon Deppe
Filling in shadows in sunshine is the simplest off-camera flash set-up. The flash is placed opposite the sun so that it lifts the shadows, lighting the subject evenly from both sides.
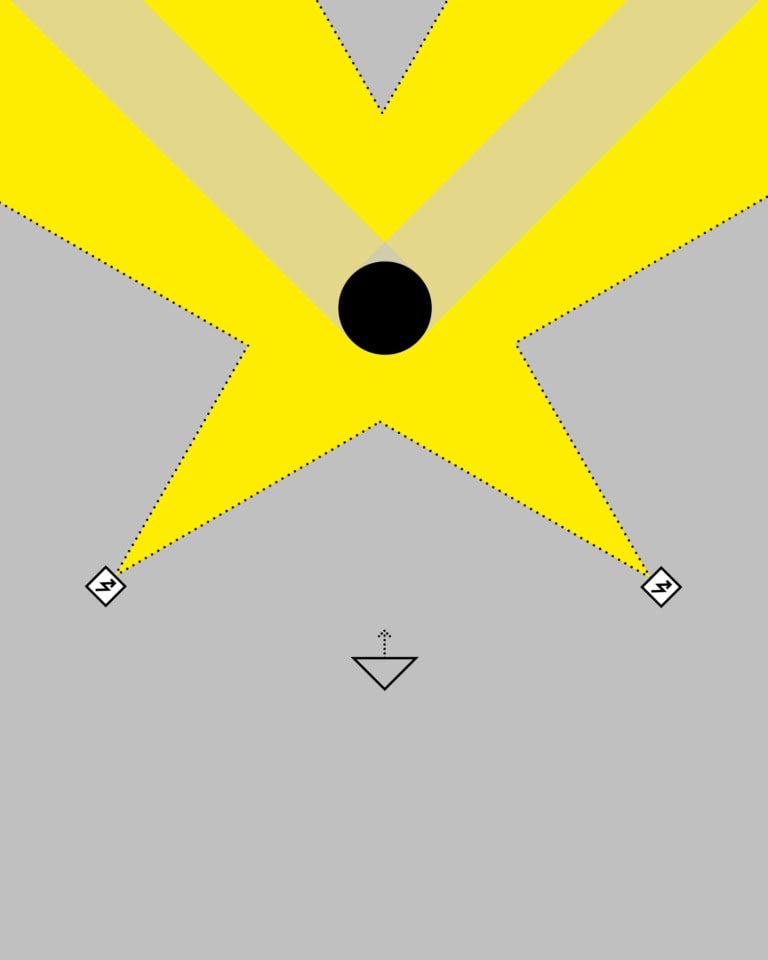 Graphic: Simon Deppe
For even, shadow-free lighting, two flashes are aimed at the subject at 45° from the right and left. This set-up is also excellent indoors, as it stops shadows falling on the background, such as a wall behind the subject. The flashes are positioned far enough to the side that they can easily be kept out of the frame.
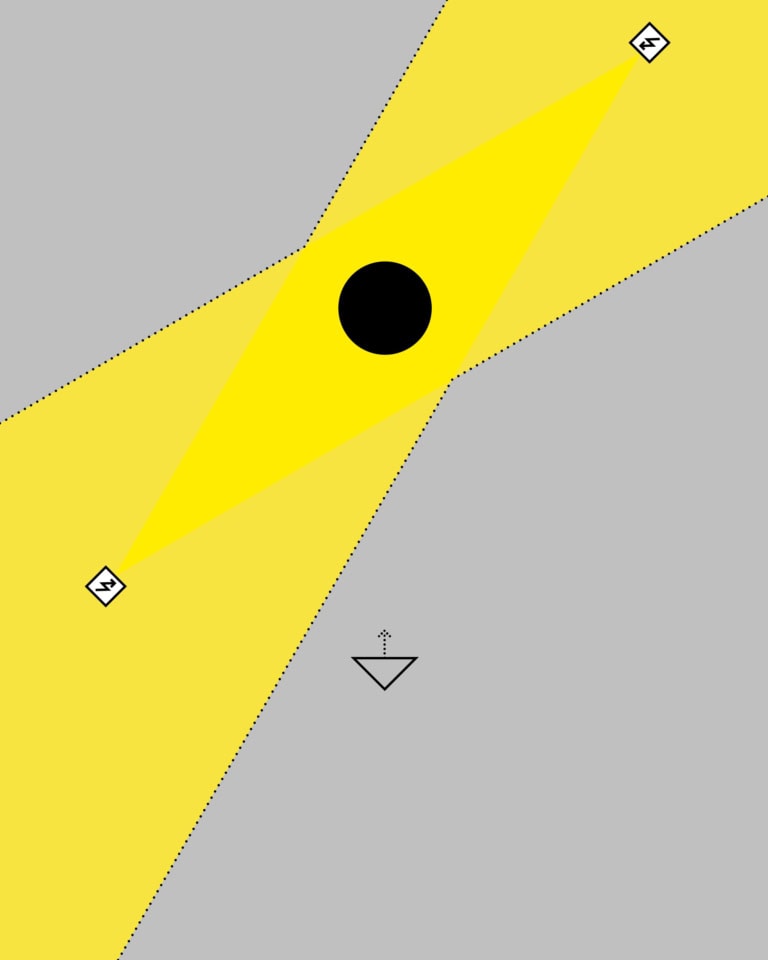 Graphic: Simon Deppe
Cross lighting is a classic studio set-up for portraits, but it also works brilliantly on the go. Two light sources are placed exactly opposite each other with the subject in the middle. One half of the face is lit, while a rim of light appears along the edge of the head on the other side. Tip: one of the two light sources can always be replaced by the sun.
 Graphic: Simon Deppe
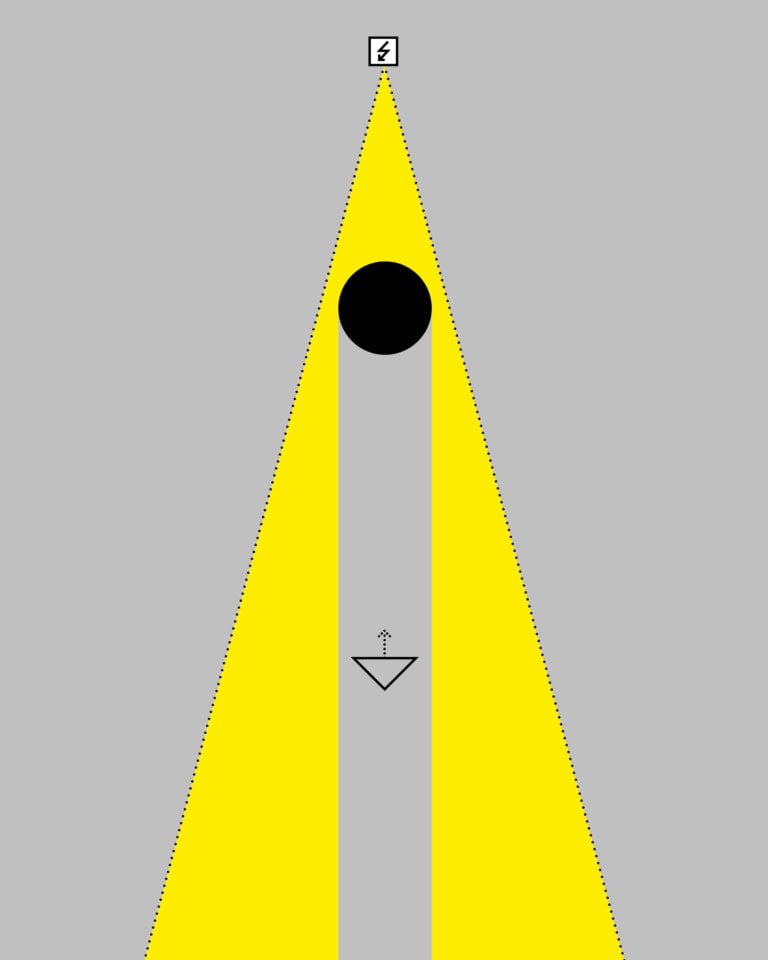
Dramatic backlight: the flash is placed directly opposite the camera with the subject in between. This creates a striking rim of light that makes the subject stand out impressively from the background.
When working with different lighting set-ups, too, the rule is: practice beats theory! To develop a good feel for light, it’s crucial to experiment a lot in practice. That way you learn how different light sources work and which set-up suits a particular situation best. The interplay of artificial light and daylight is just as important. Flashes behave differently indoors and outdoors: indoors you often have to find ways to avoid shadows behind your subject, whereas outdoors they usually don’t matter.
Tip: in any set-up with two flashes, the sun can replace one of the light sources.
8. Colour temperature and flash distance
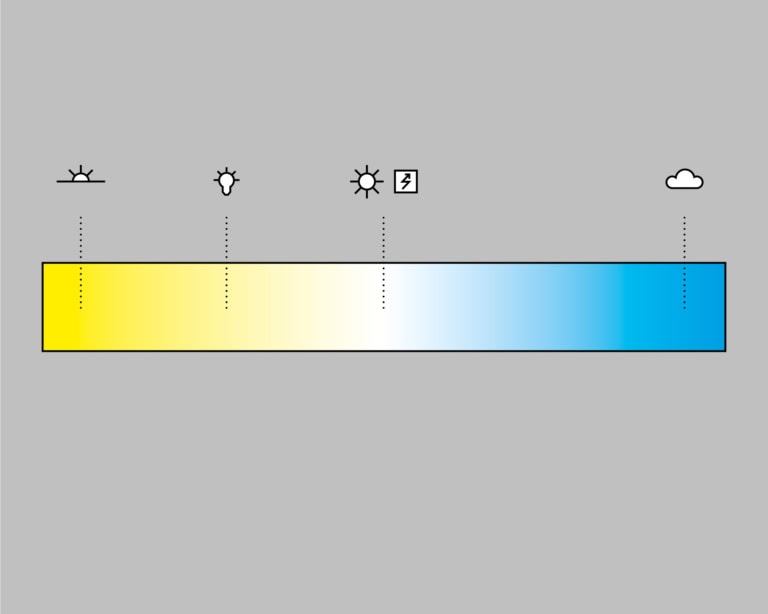
If you mix different light sources, you may run into problems with colour temperature. Every light source has its own colour characteristics. While our eyes adapt and often don’t notice the differences, cameras are very sensitive to them. In the picture, this shows up as a strong blue or yellow cast, for example.
With a single light source, that’s usually not a problem – the colour temperature can be corrected either in the camera or in post-production. But if you combine light sources with different colour temperatures, you get an unwanted effect: one part of the picture looks bluish, another yellowish. A uniform correction is hardly possible when several colour temperatures appear in one picture at the same time.
 Graphic: Simon Deppe
Colour temperature is measured in kelvin (K):
- Sunlight is around 5300 K – most flashes are matched to this, so they have the same colour temperature.
- An overcast sky has a cooler colour temperature of 7000 K to 8000 K, so flash looks yellowish by comparison while the surroundings appear bluer.
- Artificial light such as light bulbs usually gives off warm, yellowish light of around 2600 K.
- Sunsets can reach colour temperatures as low as 1800 K.
Tip: when using flash, always pay attention to the difference between the colour temperature of the ambient light and that of your flash. That’s the only way to avoid colour casts and create harmonious lighting.
 Graphic: Simon Deppe
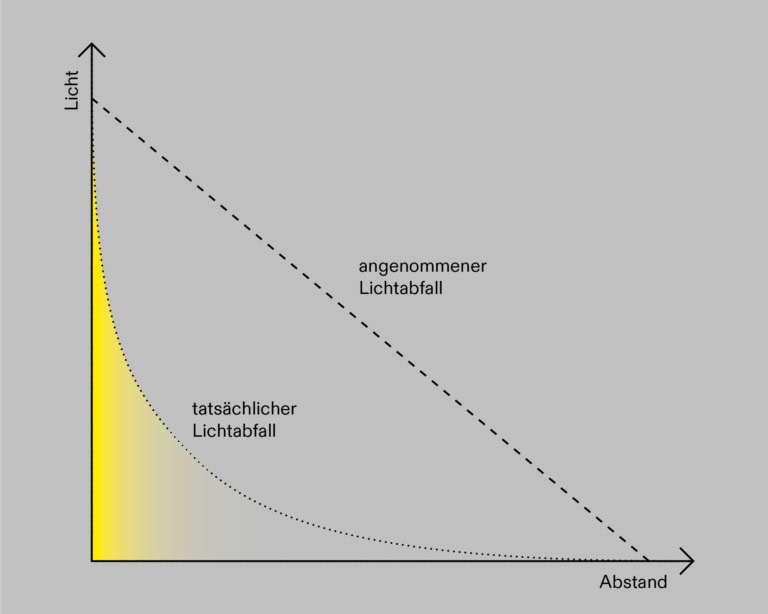
Light fall-off with flash follows the inverse square law, which may seem counter-intuitive to many photographers at first. Light intensity decreases not linearly but with the square of the distance. If you double the distance between flash and subject, the amount of light drops to a quarter of its original intensity. – 1 m: 100% light output – 2 m: 25% light output – 4 m: 6.25% light output In practice, this means that light falls off very sharply at short distances. That quickly leads to uneven lighting: when photographing several people at different distances, they are often lit to different brightness. The effect also severely limits the effective range of flash units.
9. Summing up
In conclusion, flash on the go is an exciting but challenging technique that requires both technical knowledge and creative sensitivity. Direct, bounced or off-camera – each method has its own advantages and uses. What matters is to use flash deliberately and subtly, so that it supports the message of the picture rather than outshining it. With the basics from this article, you have what you need to master flash on the go with confidence. Now it’s time to try things out, experiment and shape light consciously!